An introduction to making dashi, a central component of Japanese cooking and one of the tastiest stocks in the world.
Around a year ago I decided I wanted to make miso soup, but properly – rather than pouring boiling water into a bowl of pre-packaged ingredients. Knowing very little about Japanese cooking, I turned to the internet (we’re not so different, you and I) and quickly discovered that every recipe required something called dashi.
I had never heard of dashi before, and it turns out I’d been missing out not only on a delicious stock, but one that’s incredibly easy to make.
What is dashi?
Dashi is the collective word used to describe a range of stocks that form an essential building block of Japanese cuisine. Described as “liquid umami” by J. Kenji López-Alt in The Wok, the key feature of dashi is its rich saltiness. This derives from the kombu seaweed that is heated along with other ingredients to make a variety of different stocks.
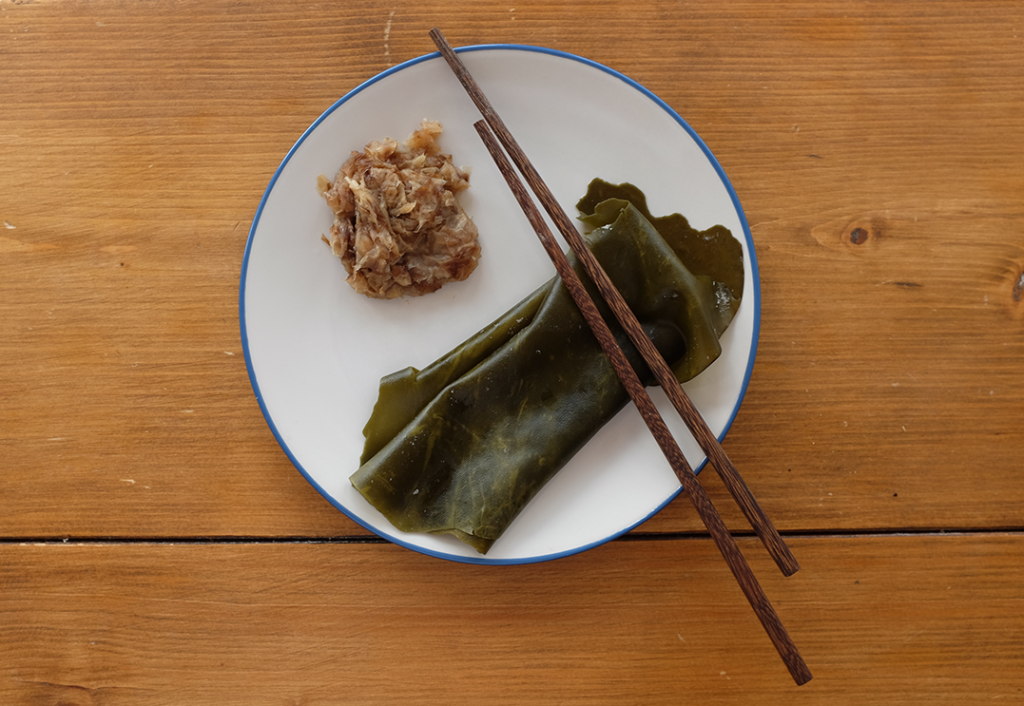
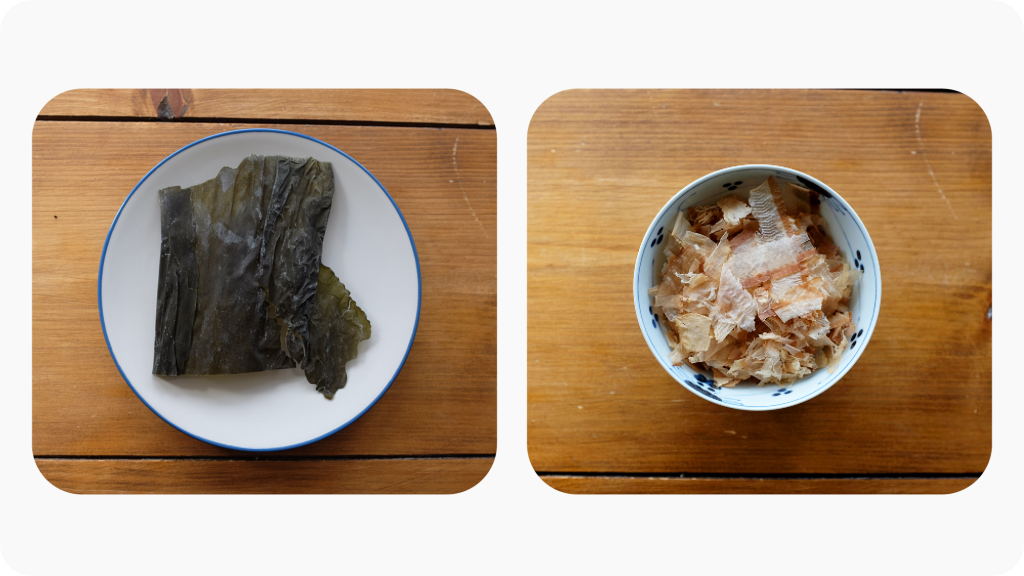
Most commonly, as with the recipe below, dashi is made with just three ingredients: water, kombu seaweed and katsuobushi (dried bonito flakes). Other ingredients that are commonly added to dashi stock are dried shiitake mushrooms and niboshi (small dried sardines) – and it’s also possible to leave out any fish-based ingredients if you want to make a vegetarian dashi.
The only essential component of dashi is kombu seaweed. The depth of flavour infused into the broth by this dried kelp comes predominantly from the glutamic acid it contains. In fact it was by studying this magical acid in kombu that Dr. Kikunae Ikeda first isolated the taste we now know as “umami” and went on to create monosodium glutamate (MSG) – the flavour enhancer that is commonly used today the world over. When Kenji López-Alt describes this stuff as “liquid umami” it is actually a statement of fact.
Making dashi: a step-by-step guide
On top of its rich taste, dashi has the added benefit of being very quick to make. Unlike many other stocks which take hours to prepare, you can make a panful of dashi in under half an hour.
These are the steps I follow in order to make enough dashi to keep me in miso soups for a week or so. If you want to make less stock, simply scale down the ingredients keeping the ratios of water, kombu and katsuobushi the same. So, let’s get started.
Ingredients
- 1.5 litres of water
- 10g katsuobushi bonito flakes
- 1 piece of kombu (about 10cm x 15cm)
Equipment
- Saucepan
- Large mixing bowl
- Sieve
- Wooden spoon
- Chopsticks/tongs
- Skimmer
- Containers to store the dashi (I use two large plastic tupperwares)
1. Add the water and kombu into a pan
Add 1.5 litres of cold water to a pan, then take a piece of kombu and submerge it. You can also cut 1-2 inch slits down each side of the kombu with scissors before adding it to the water to help extract extra flavour, but it’s not essential.
Note: if you see some white residue on your kombu you do not need to wipe it off, in fact you’ll get a richer dashi if you don’t. This stuff is called mannitol and contains lots of umami flavour, don’t worry it’s not dirt.
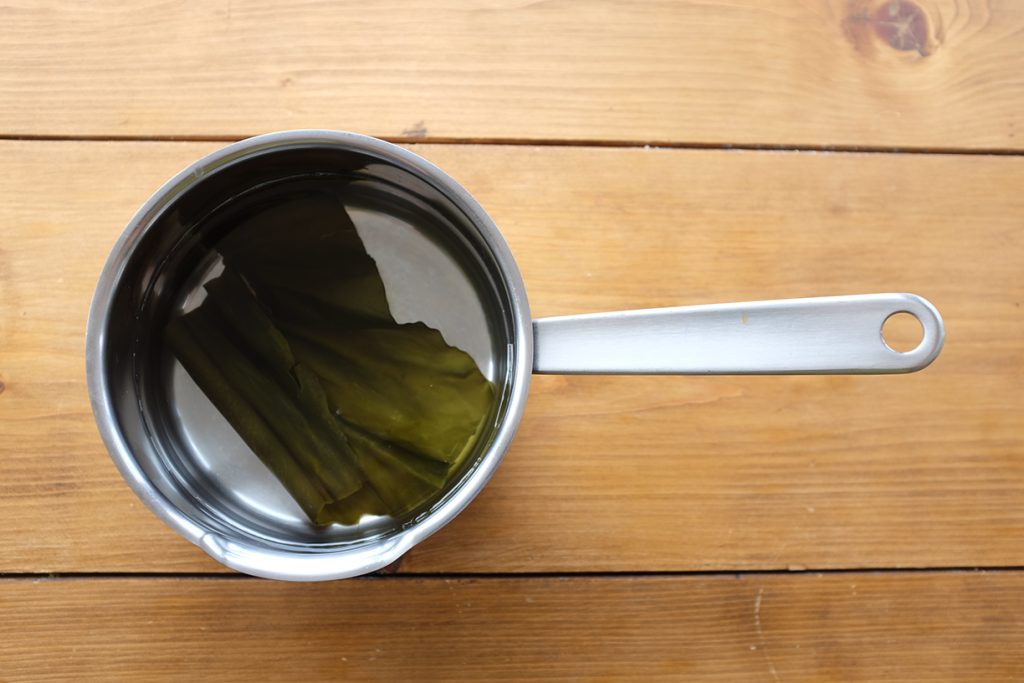
You can either leave the kombu soaking for a while (anywhere from a few hours to overnight) or move straight to step 2 and start simmering the water. You’ll end up with a slightly more salty and flavourful broth if you cold steep the kombu for a while, but personally I usually don’t bother and simply start making my dashi straight away.
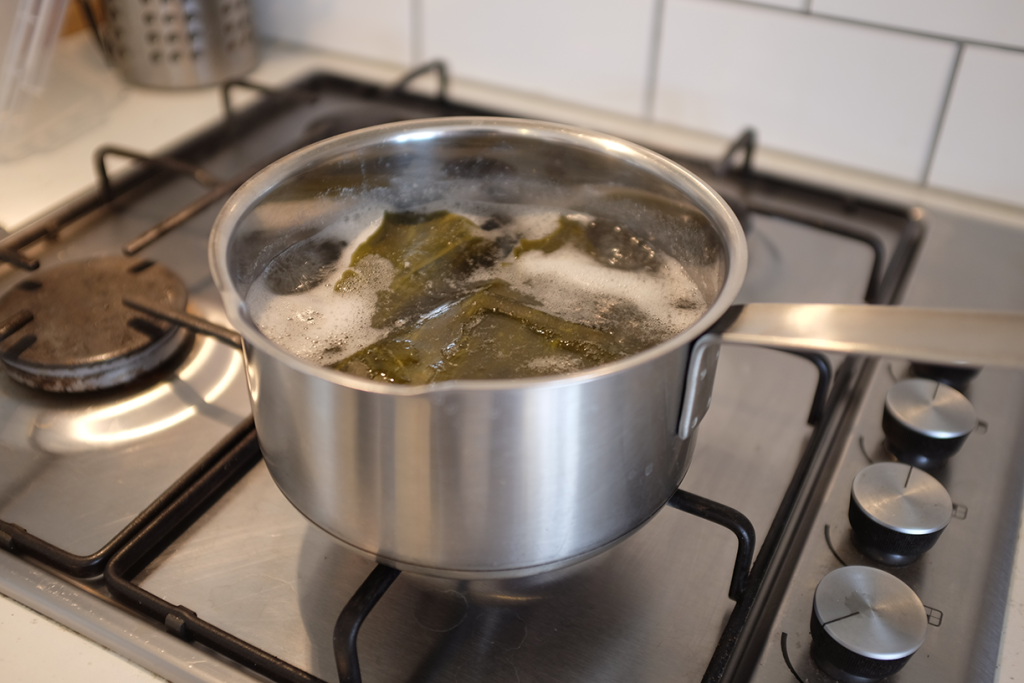
2. Put the water in the pan on a high heat and bring to a simmer
To extract the flavour from the kombu you want to bring the water to a simmer – but be careful not to boil it. If the water starts fully boiling then the flavour will start to turn bitter, so bring the water almost to boiling point and adjust the heat to make sure it doesn’t get too hot.
3. Take out the kombu and turn off the heat
Once the water has started simmering, the kombu’s job is done. Remove the sheets of seaweed (which will now be limp and slimy) from the water using chopsticks or tongs and set them aside.
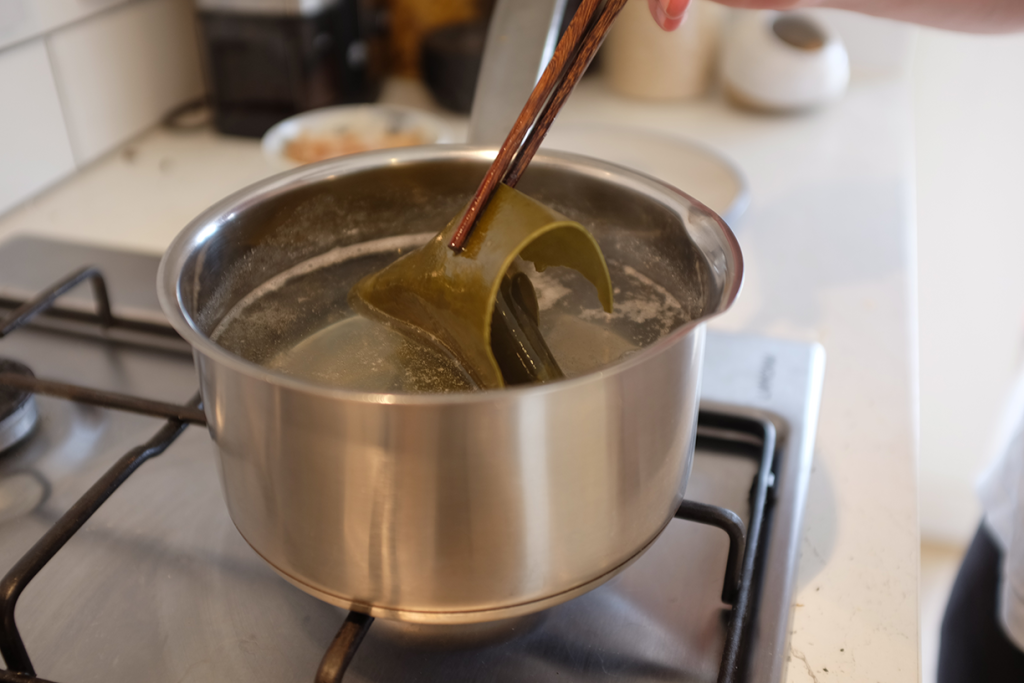
There are a variety of dishes you can cook with kombu, but I’ve never found one that works with the type I find most easily available (WEL-PAC Dashi Kombu). In my experience the seaweed is still too tough to make tsukudani or other recipes I’ve seen recommended. This is more than likely a “skills issue” on my part, but I’m afraid it means I’m not able to honestly recommend dishes you can cook with leftover kombu – if you find a method that works I’d love to hear about it.
4. Skim any white foam off the water
The process of simmering the kombu sometimes leaves a foamy white residue on top of the water. Before adding the katsuobushi, remove this using a skimmer.
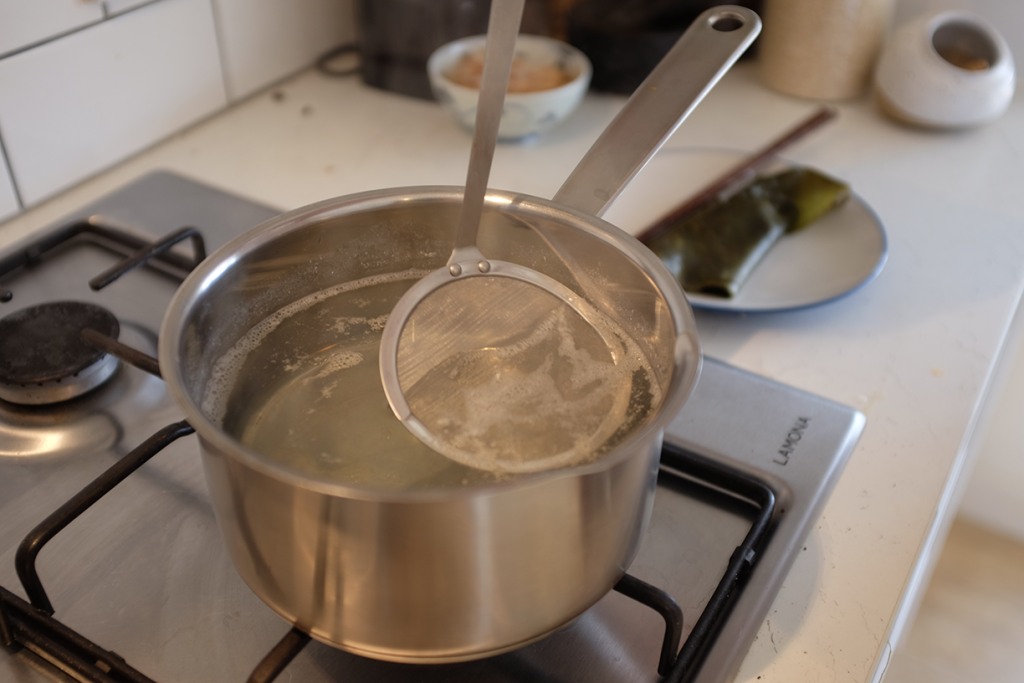
This white residue is simply a result of a chemical reaction when the proteins in the seaweed are heated and it’s not dangerous, so it’s alright if there’s a little left. If you see a lot of white foam on the top of the water, it’s likely you simply let the water get slightly too hot (don’t worry, the dashi is unlikely to have become bitter unless you fully boiled the kombu).
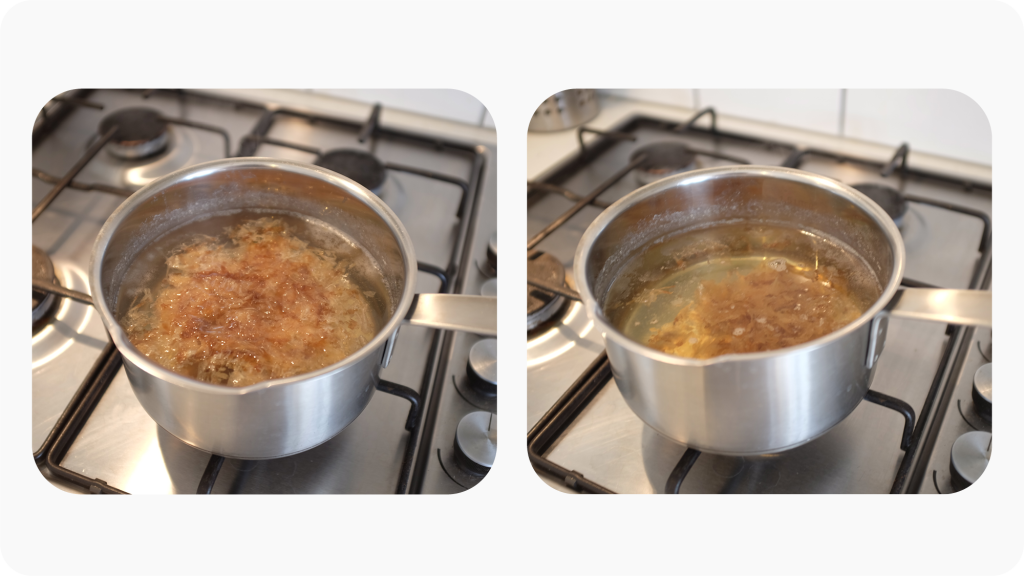
5. Add the katsuobushi flakes and leave for 10 minutes
With the heat off, add 10g of katsuobushi flakes to the pan. Give these a nudge with chopsticks or a wooden spoon to make sure they’re all wet.

Set a timer for 10 minutes and leave the fish flakes soaking on the top of the water.
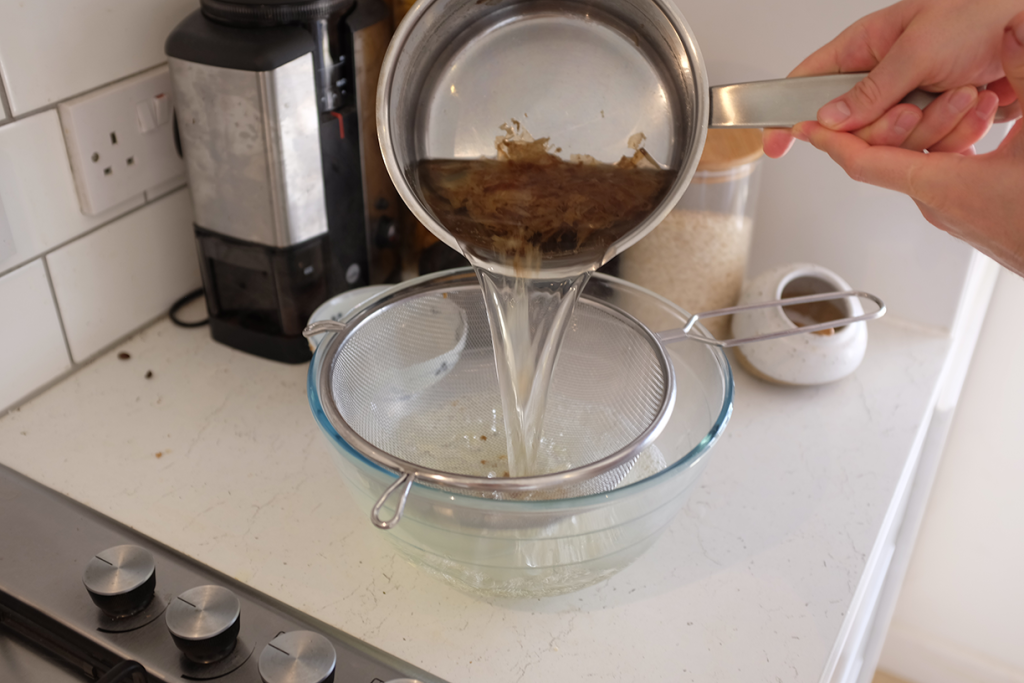
6. Sieve out the fish flakes
When 10 minutes are done you should see that all the katsuobushi flakes have sunk to the bottom of the dashi (if some are still clumped together on the surface, give them a poke and they should sink). This means they’re ready to be sieved out.
Place a sieve over a large mixing bowl and pour the liquid and fish flakes through it. Once again I haven’t attempted to make anything from the leftover flakes, so let me know if there’s something I should try.
7. Ladle/pour the dashi into containers (if not using immediately)
Congratulations, you’ve made your first batch of dashi! If you’re not using all of it immediately then I recommend putting the broth into freezer-safe containers.
Personally I like to use two tupperwares, with one going in the fridge and one in the freezer. The stock lasts 5-7 days in the fridge (if it starts to smell overly fishy, then pour it away) and for months in the freezer.
When I have a tupperware full of dashi in the fridge, my favourite thing to do is use it to make miso soup in the mornings, and then to make various new Japanese meals throughout the week.