A step-by-step guide to making pasta at home, why it’s more than worth the effort and how to get perfect tagliatelle every time.
I eat a lot of pasta. From the classic easy meal of fusilli or penne with pesto, to rich lasagnes filled with ragu or the British household staple of spaghetti bolognese – pasta has always been a key part of my diet, capable of being both comfort food and an extravagant meal.
Yet it’s only recently that I started turning my hand to making my own pasta. Originally driven by a desire to ‘make more and buy less’ I decided to give it a go; it’s now something I recommend to everyone. Similarly to making dumplings there’s something I find quite therapeutic about the process, and the results are immediately obvious from the moment you take your first mouthful: each strand of pasta has more substance to it and feels much more part of the meal than simply a base carbohydrate supporting a nice sauce.
Making tagliatelle does take a bit of time (a couple of hours or so), so I mitigate this by making large batches and freezing the pasta in individual nests. This means I always have home-made pasta ready to go, and has also led to me having a much better understanding of how much ‘one potion’ of pasta is (let’s just say it turns out I had been slightly exceeding this…). So, let’s get started!
Making tagliatelle: a step-by-step guide
Ingredients
- 400g of 00 pasta flour
- 4 medium-sized eggs
- 1 egg yolk
- Rice flour (to prevent the pasta sticking together)
Equipment
- Pasta machine
- Dough scraper (optional)
Making tagliatelle: a step-by-step guide
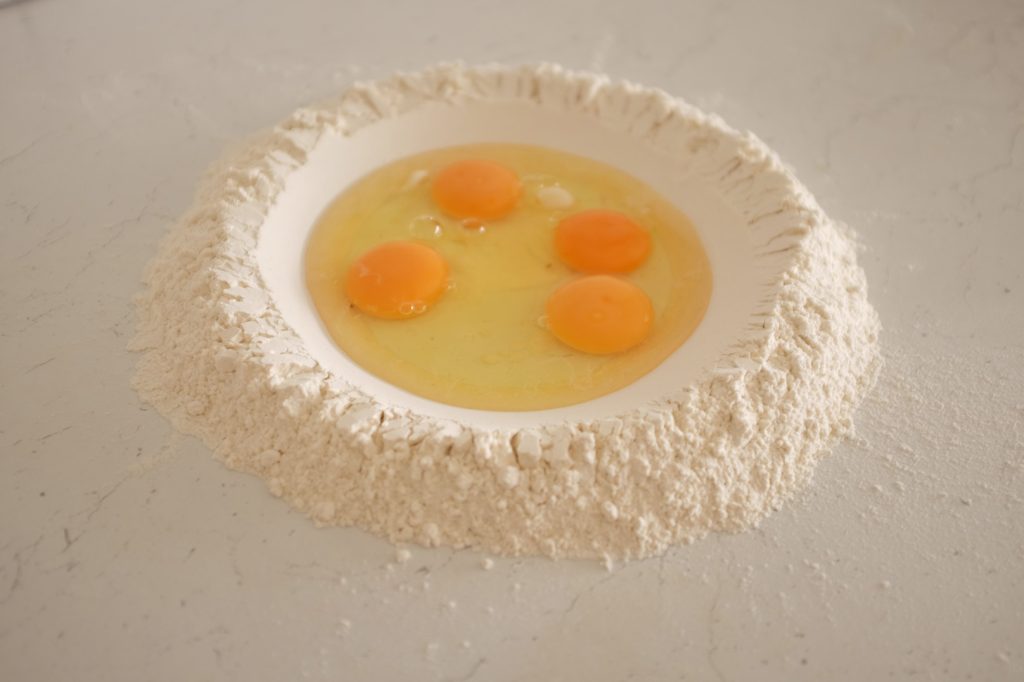
1. Create a well of flour and crack your eggs into it
To start, weigh out 400g of 00 pasta flour and tip this onto a clean surface. Then make a wide well in the flour (I find it easiest to do this using the bottom of a bowl, but you can also just use your hands) and crack four eggs and one egg yolk into it. The reason you want to make the well wide is that a tall, narrow volcano-like well won’t be big enough for all the eggs, regardless of what it looks like (trust me).
2. Mix the flour and the eggs and start to knead together
To start making the dough, mix all the eggs so the yolks and the whites are combined and then start gradually mixing flour into the eggs from the wall of the well. I find it easiest to do this with a dough scraper, but you can also use a fork, spatula or even just your hands. Once most of the flour is incorporated into the eggs, start to knead the dough with your hands, pressing firmly and using the stickiness of the dough to collect the remaining flour.
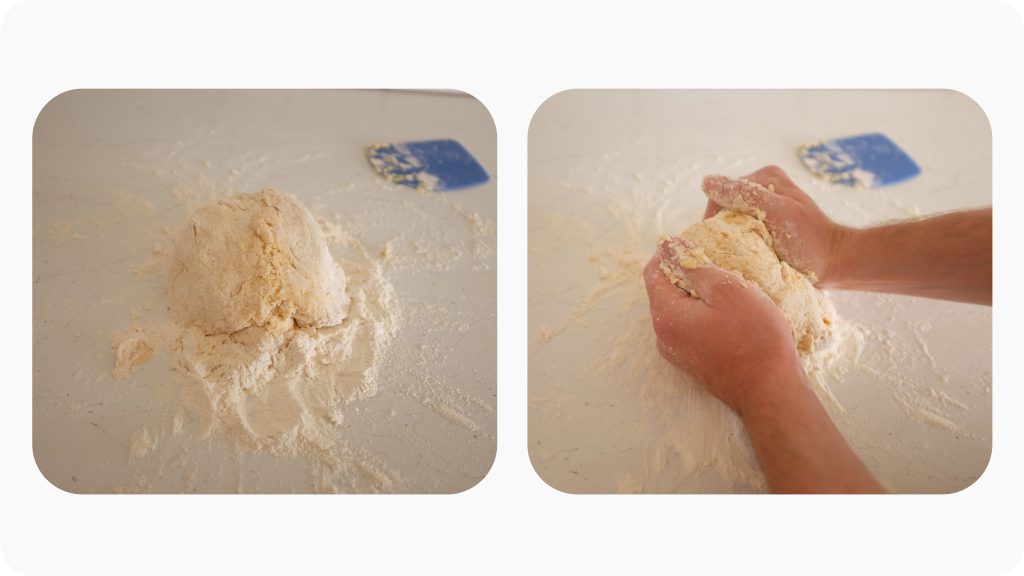
Start kneading with your hands to incorporate all the four (as you kneed the dough will get stickier and pick up more of the flour). Photography © Max Adams.
At this stage the dough will be very sticky, and it will take a bit of time to gather all the flour – you will also end up with a lot of dough sticking to your hands, which is easy to remove by rubbing your hands together and adding the pieces of dough back into the main ball you’re making.
3. Continue kneading until the dough is smooth and tacky (about 10-15 mins)
To develop the gluten strands inside the pasta and get it ready for rolling into sheets, you need to knead the ball of dough until it is smooth and tacky to touch. Unlike when kneading other forms of dough (e.g. for sourdough bread or chapatis), the process doesn’t require too much stretching and is more about pressing the dough firmly and folding it back into a fist-like shape.
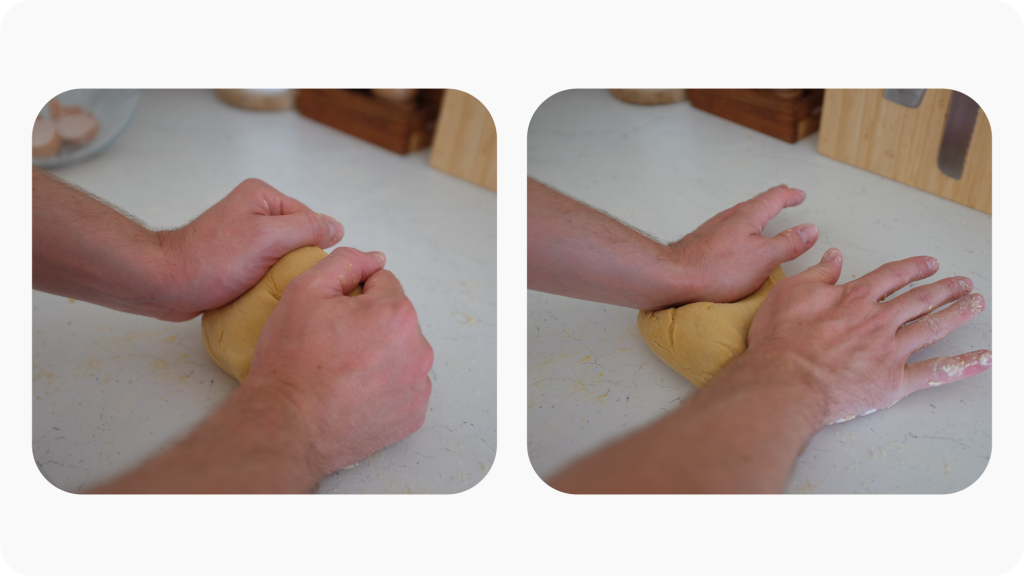
What you want to do is take the ball in your hands and press firmly down and slightly forwards (pressing diagonally through the dough), then fold it back and repeat the process, rotating the ball regularly so all parts of the dough are kneaded. At the beginning the dough might feel very dry and you’ll be tempted to add some water – don’t do this; as you knead the dough it will come together and you don’t want the dough to be too wet as this can result in wet dough flaking off and clogging up the machine when rolling your sheets of pasta.
Once you’ve done this for 10-15 minutes the dough should be smooth and tacky to the touch, and if you press it with your finger you should see it ‘bounce back’ a little. This means you’re ready to go.
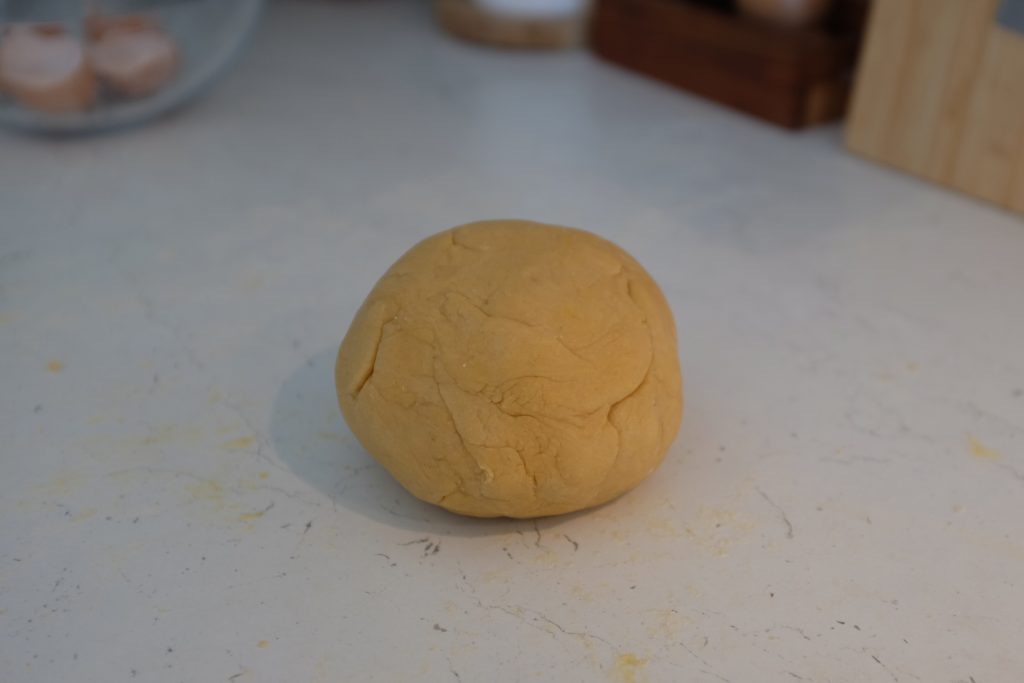
4. Tightly wrap the dough in cling film and leave for half an hour
The gluten strands in the dough still need a little more time to develop, so once you’re ready take some cling film and tightly wrap your ball of dough. You need to leave this for at least half an hour and up to 2 hours at room temperature (it will be fine to use after half an hour).
If you’re not making pasta straight away, you can leave the dough wrapped in cling film in the fridge for a day to use later – or you can move straight on to making your tagliatelle.
5. Take a small piece of dough and press it flat (wrap the rest of the dough back in cling film)
Start out by flouring your work surface with a handful of rice flour to stop the dough sticking. Then take a small piece of dough off the ball, before wrapping the rest of the ball back in cling film so it doesn’t dry out. Press your piece of dough flat with your hand – you want it to be roughly the size of your palm, if it’s substantially too big or too small either put some of it back with the main ball of dough or take a bit more.
Dust either side of your flattened dough with some rice flour and you’re good to start rolling it through the pasta machine.
6. Roll the dough through the settings of your pasta machine
Using your pasta machine you can now gradually flatten your dough into a sheet of pasta. Make sure the machine is clamped in place on your surface and then set the wheel on the side to ‘0’ before rolling your dough through it. The dough should come through cleanly, if you can see any damaged and sticky bits, then add some more rice flour and flatten it again with your hand before trying again – you don’t want any wet bits of pasta dough sticking to your machine.
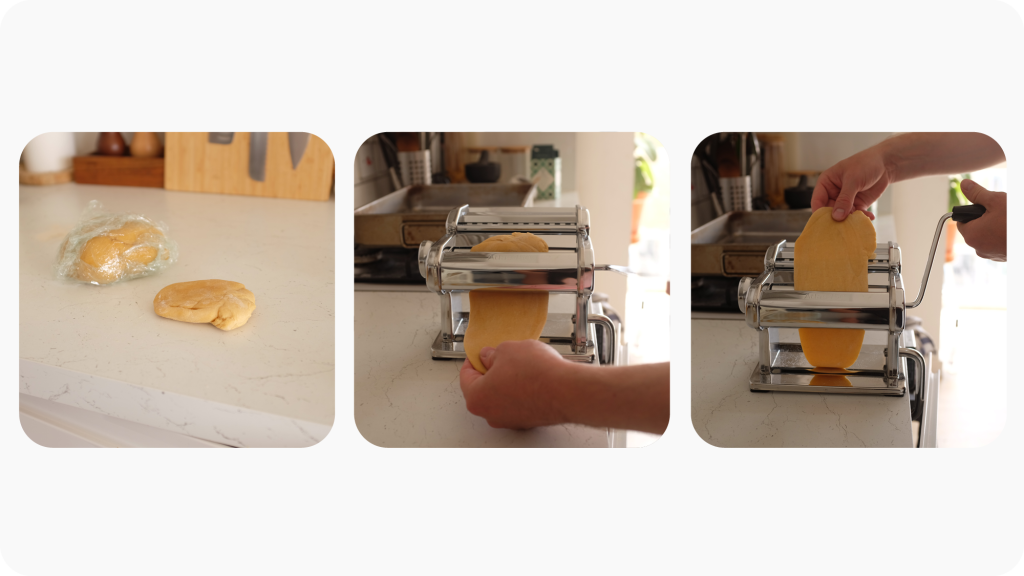
Repeat this process over again, moving the wheel up a setting each time (roll it through ‘1’, then roll it through ‘2’ etc.). Each setting makes the dough thinner, and for tagliatelle I roll each sheet until it’s gone through the ‘7’ setting as I find this makes the nicest pasta.
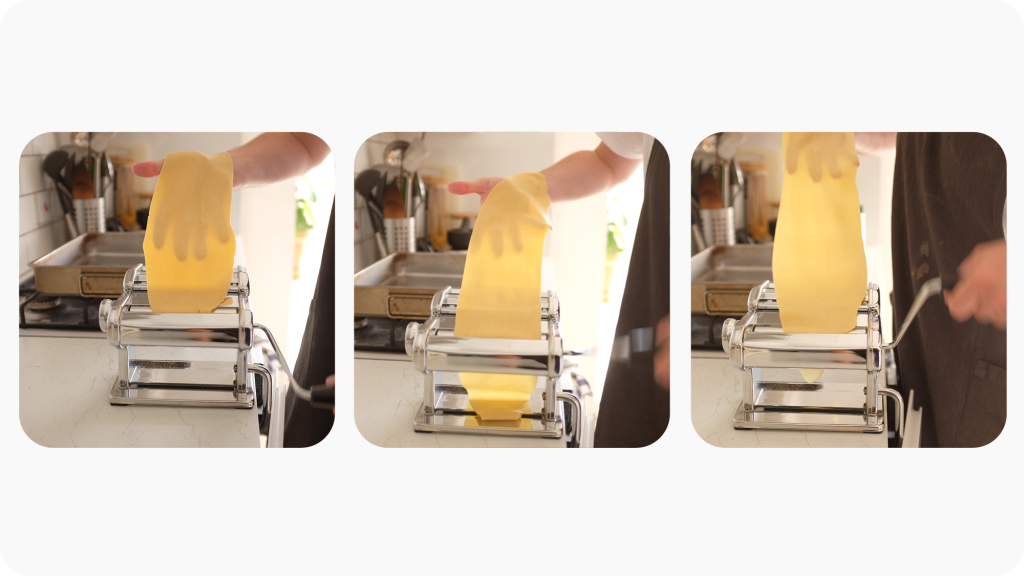
7. Cut the sheet of dough to the length you want your tagliatelle
After rolling the dough you’ll end up with a very long sheet of pasta. If you want comically long strands of tagliatelle, then feel free to leave this as is and move straight to step 8, but otherwise simply take a sharp knife and cut the dough to the length you’d like (generally either cutting the dough in half or thirds). When you cut the dough, you should see it ‘bounce back’ a little as you did when you pressed the ball of dough in step 3.

8. Roll it through the tagliatelle cutter of your pasta machine
Now it’s time to cut your pasta – you can do this with a knife if you wish, but it’s much easier and quicker to use the attachment on your pasta machine (the majority of pasta machines come with a cutter for spaghetti and tagliatelle as standard). Using the machine also makes it much easier to ensure every strand is the required ‘1/12,270th of the Asinelli Tower’ width as authentic tagliatelle should be – in case you’re cooking for some Italians coming over wielding tape measures!
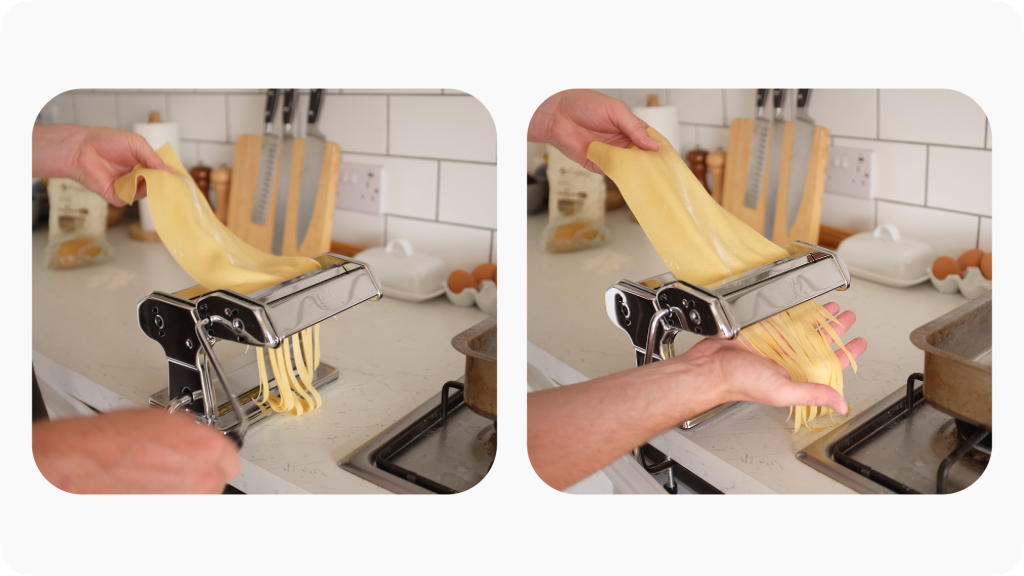
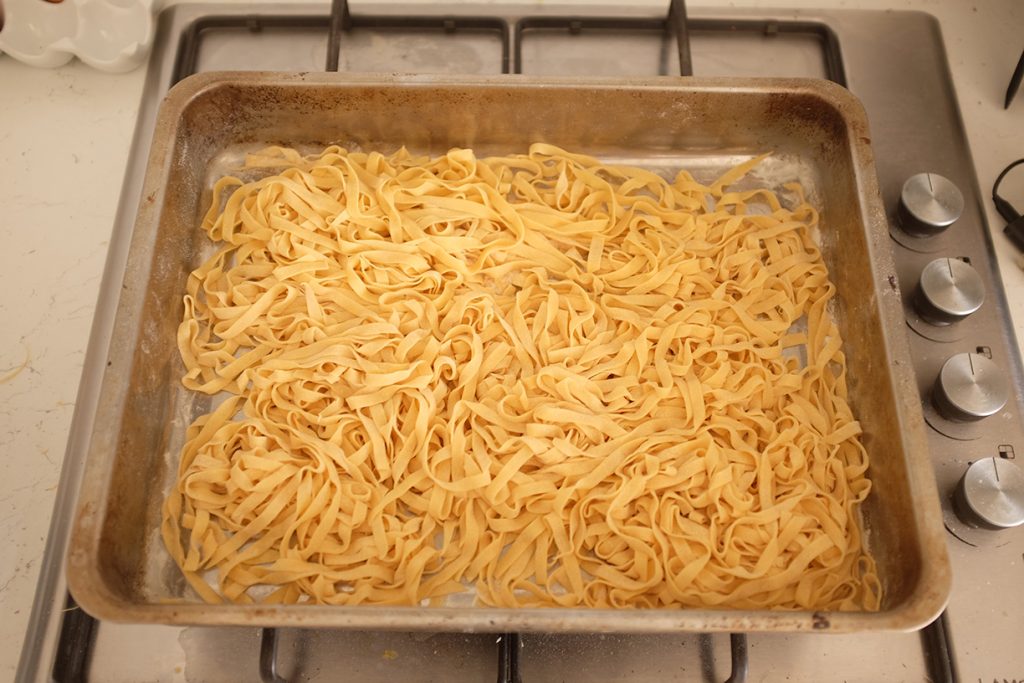
Simply take a sheet of rolled pasta dough and feed it through the pasta cutter by turning the hand crank. Gather the strands and immediately place them in some rice flour, making sure the strands are not stuck together, as there is a risk of lots of strands clumping together and being incredibly hard to disentangle.
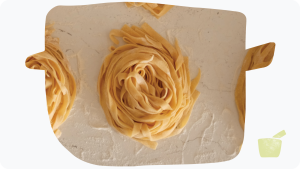
9. Repeat and make the pasta into nests
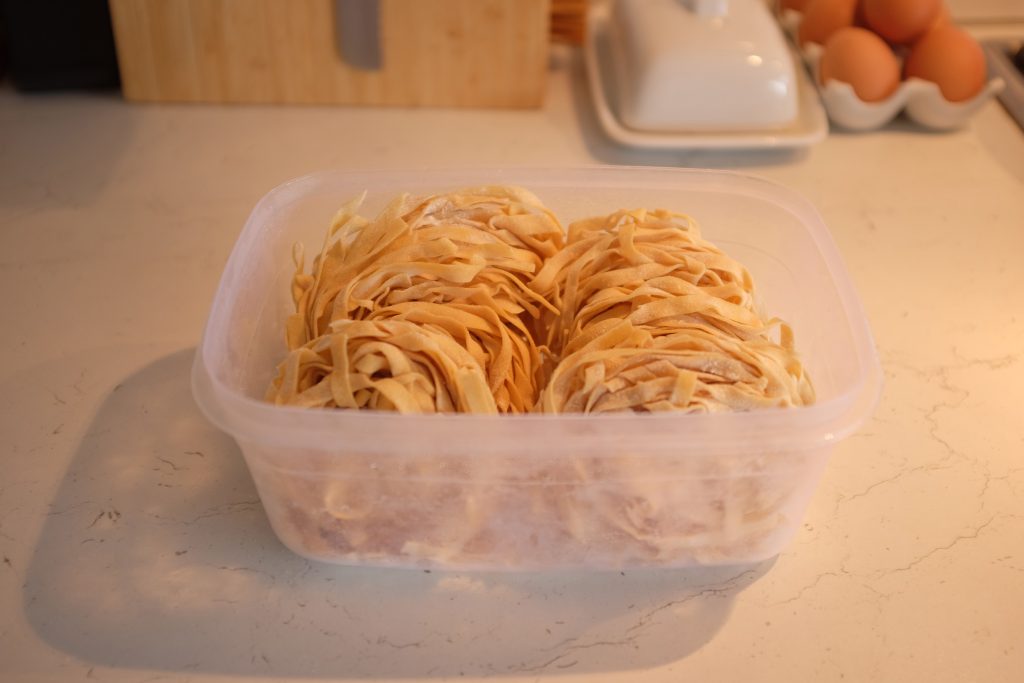
Keep repeating this process until you have made all your dough into delicious strands of tagliatelle (regularly making sure they’re not sticking together and adding a little more rice flour if needed). What I do at this point is make individual portion sized nests which can be frozen and used whenever I fancy eating pasta (maybe with some homemade pesto).
Using the ratios of flour and eggs in this guide, you should end up with around 700g of tagliatelle. Because of the egg content of the pasta I find you need less to a portion than you do when using store-bought dried pasta (which is made simply using water and flour), so I make nests of pasta weighing 55-60g, meaning this method makes somewhere in the region of 12-13 nests.
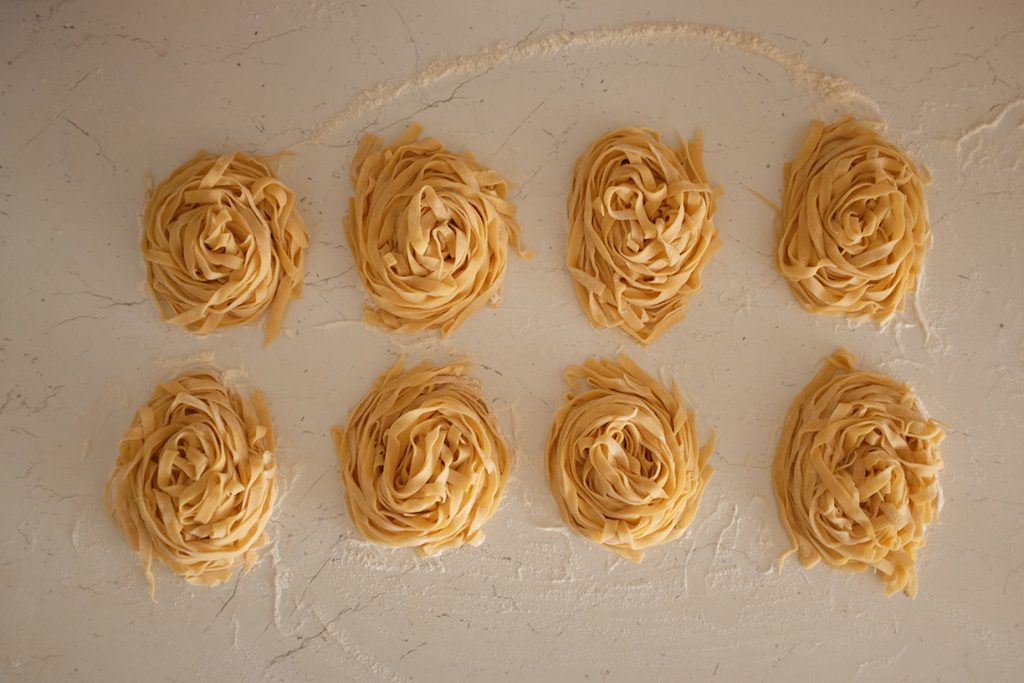
To make each nest, take the required weight of tagliatelle and make sure every single strand is lying completely straight, then roll from one end creating a swirl. This method works well because each nest holds the pasta together when frozen, and easily unravels when cooked in boiling water to cook evenly. Freeze the nests individually in small tupperwares (you can usually find small circular tupperwares very cheaply in pound/discount shops), and you can then combine them in a bigger container when they’re frozen solid to take up less freezer space.
Because of the thinness of the pasta, the nests cook from frozen in about 2 minutes, and from fresh around 1 minute (depending on how al dente you like your pasta). Enjoy!