An easy-to-follow guide showing how to turn just two ingredients into one of the world’s best flatbreads.
Also known as rotis, chapatis are a staple of Indian cooking and one of the most common forms of bread eaten on the sub-continent. One reason for this is that they’re very simple to make, requiring just two ingredients: atta wheat flour and water.
In the guide below I recommend adding a bit of salt to flavour the dough, and you’ll also find recipes that recommend adding vegetable oil – although I personally leave this out and simply use oil to coat the pan when heating the chapatis. These are just variations though, and as long as you have some atta flour and a tap you can make great chapatis.
In terms of kitchen equipment, chapatis are best finished on an open flame, so it’s ideal if you have a gas hob in your kitchen to do this (always remembering to be very careful to avoid burning yourself, of course). If you have an electric or induction stove then don’t worry, as it’s also possible to finish chapatis under a grill or on your tawa/frying pan.
Making chapatis: a step-by-step guide
Ingredients
- Atta flour (250g)
- Water (roughly 180ml)
- Salt
- Vegetable oil (for the pan)
Equipment
- Tawa or heavy-bottomed frying pan
- Mixing bowl
- Steel grill rack (if finishing on an open flame)
- Rolling pin
- Tongs
- Spatula
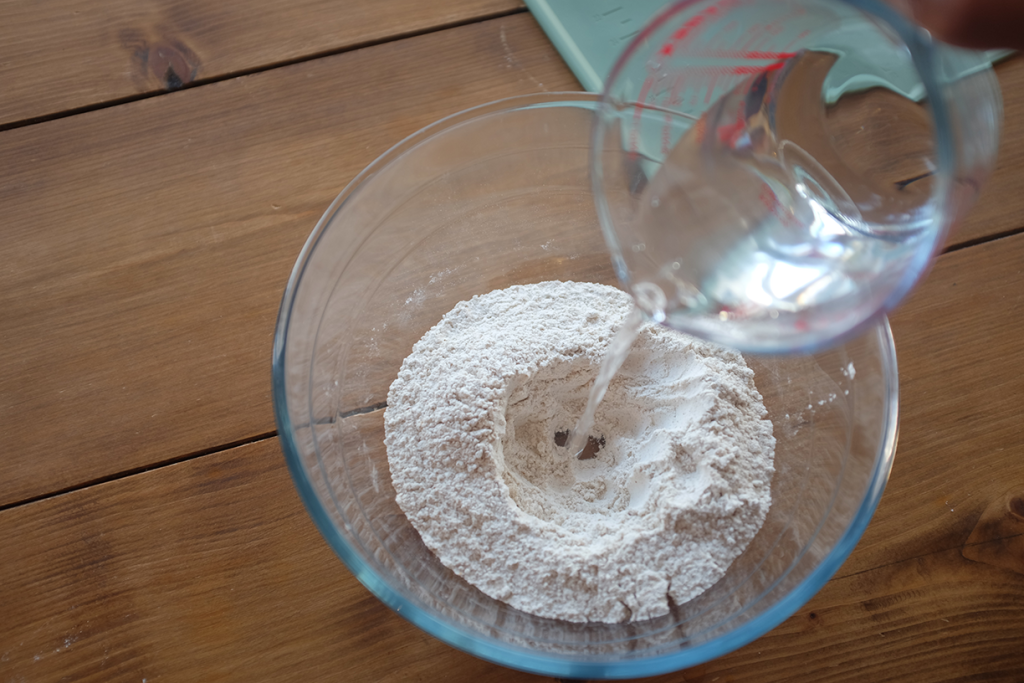
1. Combine atta flour, water and salt
The first thing you will need to do is ensure you’re using atta flour, as making chapatis with other varieties of flour doesn’t work nearly as well.
Atta is a specific variety of whole wheat flour which is made from grinding every part of the grain – giving the flour a distinct brown colour. It has a higher amount of gluten than other wheat flours, and is traditionally ground very finely using a stone chakki mill; the result is that atta feels very smooth to the touch and absorbs more water than other flours. Atta flour not only gives chapatis their colour, but the elasticity it gives the dough is essential to the cooking process.
Once you’ve got some, add 250g of atta flour and a pinch of salt to a mixing bowl and mix them by hand. Then form a well in the middle of the flour and begin to pour water into the bowl a little at a time, continuing the mix with your other hand as the dough begins to form. You want to avoid the dough becoming too wet, so keep adding water until all the flour and salt is combined into a ball of dough ready to be kneaded (you might not need all 180ml of water).
You can also add a teaspoon or two of vegetable oil to the dough while mixing, but I personally don’t bother with this.
2. Leave the dough for half an hour
To give the gluten strands time to form in the dough, leave it in the mixing bowl and cover the bowl with a wet tea towel. Leave for half an hour before kneading.
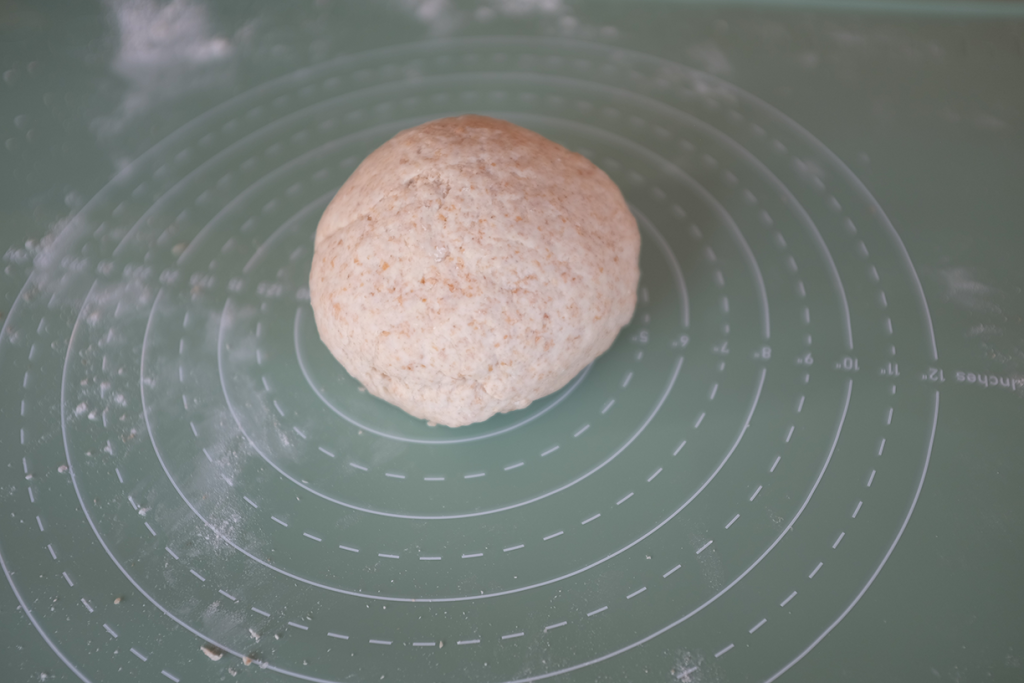
3. Knead the dough
To develop the gluten strands properly, you’ll want to knead the dough until it’s smooth (I find this usually takes 10-15 minutes).
Form the dough into a ball and then push ‘through’ it with the heel of your hand, stretching it as much as possible against the surface. Then form it back into a ball and repeat the process.
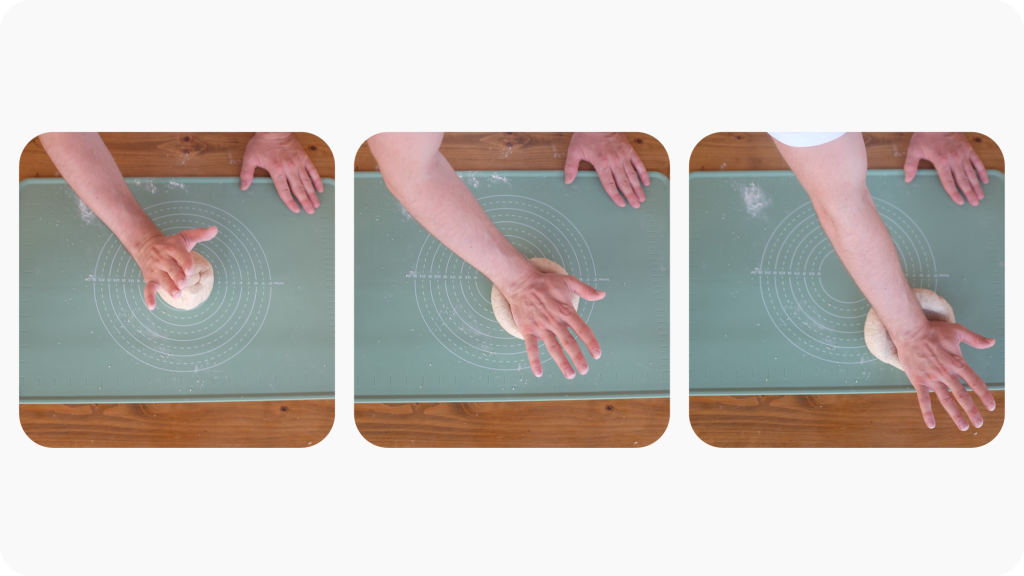
To avoid the dough sticking you might want to sprinkle a pinch of atta flour onto the surface before starting to knead.
4. Make small balls of dough
Once you have a smooth ball of dough, you need to break it up into smaller pieces – which you will then roll out into individual chapatis. Break the dough away a piece at a time and roll each piece into a ball – ideally about 3cm across.
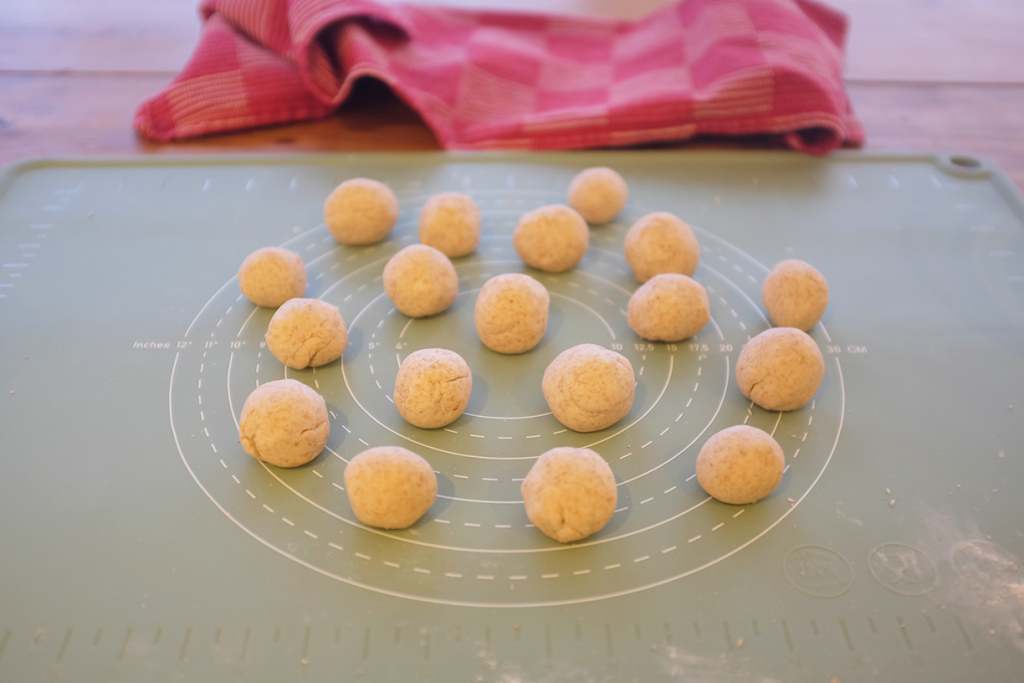
With the amounts given in this guide, you should be able to make about 20 chapatis, so aim for that number of dough balls. Place the balls back into the mixing bowl covered by a wet tea towel so they don’t dry out while you’re rolling.
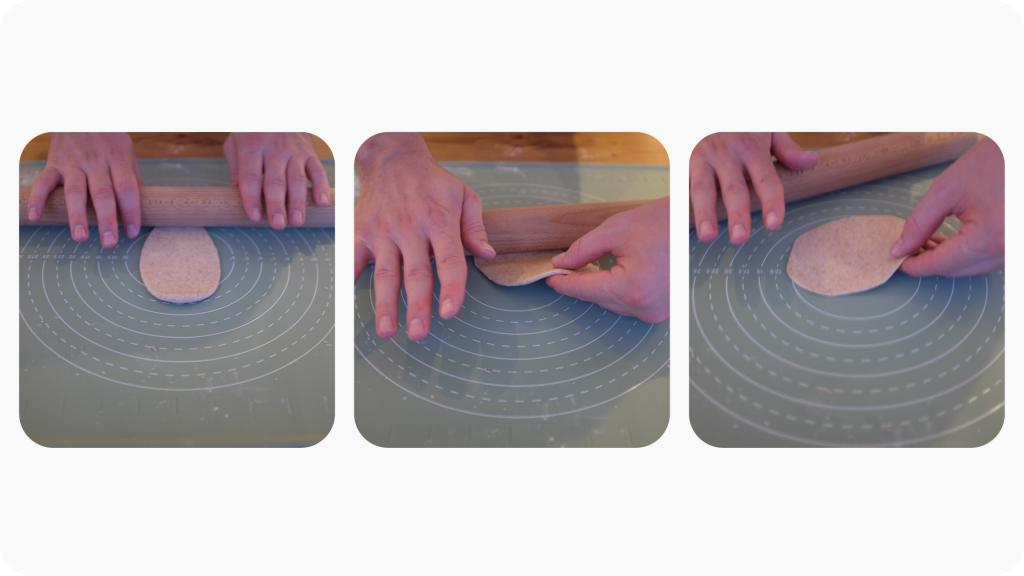
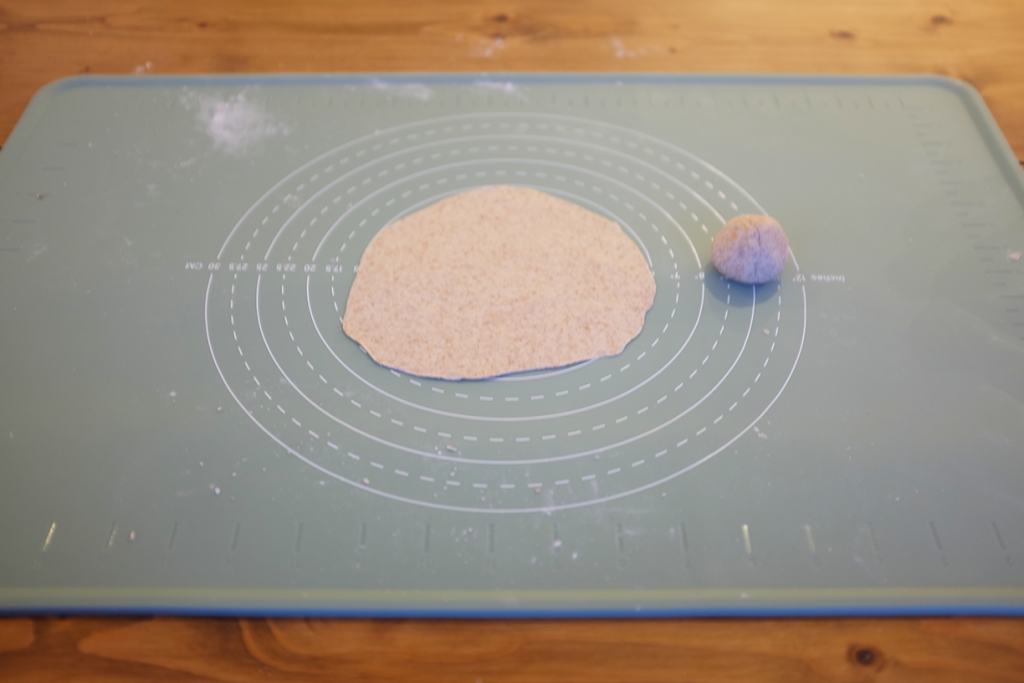
5. Roll each ball into a flat circle
Now it’s time to form your chapatis ready to be cooked. Take a ball of dough out of the bowl (leaving the rest covered) and roll it as thinly as possible into a flat circle.
The best way to do this is to press the dough ball and then roll it once an oblong shape, then use one hand to keep pushing the rolling pin back and forth while rotating the dough with your other hand. As you do this you should be able to roll the dough evenly on every side and form a circle (or at least a shape that resembles one – they don’t need to be perfect). Aim for each chapati to be 5-6 inches (12-15cm) in diameter.
The best thing to do if you’re making chapatis by yourself is to roll them in batches. The dough will start to dry out if left too long exposed to the air (hence covering the balls with a wet tea towel), so you don’t want to roll all the dough out at once. I’d recommend rolling out and then cooking 5 chapatis at a time – of course if there’s someone else in the kitchen with you then the best thing to do is for one of you to roll out the chapatis while the other cooks them.
6. Heat each side on a tawa or frying pan
You want to be using a heavy-bottomed frying pan for this because you don’t want the chapatis to get too hot on the pan. Thin-bottomed pans are very responsive to heat coming off the stove, and as such are prone to get too hot for this process. What you’re looking for is to cook each chapati lightly so it starts to turn a golden-brown colour, but being careful it doesn’t burn.
If you have a gas hob then you’ll want to have your grill rack at the ready before starting to cook, as you need to move each chapati onto the flame as soon as they’re done. If you’re instead finishing them under a grill, then you’ll want to have this heated to a high heat with a grill rack placed around 6 inches below. It’s also possible to finish each chapati on your tawa/frying pan (see below).
Use a kitchen towel to rub a small amount of oil onto your tawa or frying pan and then place it over a medium heat. Once the pan is hot, put a flat chapati dough on it. Cook for about 20 seconds (until you see some bumps/bubbles forming) and then flip it over with tongs or a spatula and cook for a further 30 seconds. The chapati is now ready to put on the flame or under the grill, so move to the next step if you’re doing this.

If you’re finishing them on your pan, then give each side another 30 seconds. You should see the dough puff up a little and dark spots start to develop where it has been in contact with the tawa/frying pan. You won’t get the chapatis puffing up like you do over a flame or under a grill, but they should still taste great – just watch out so they don’t start to burn.
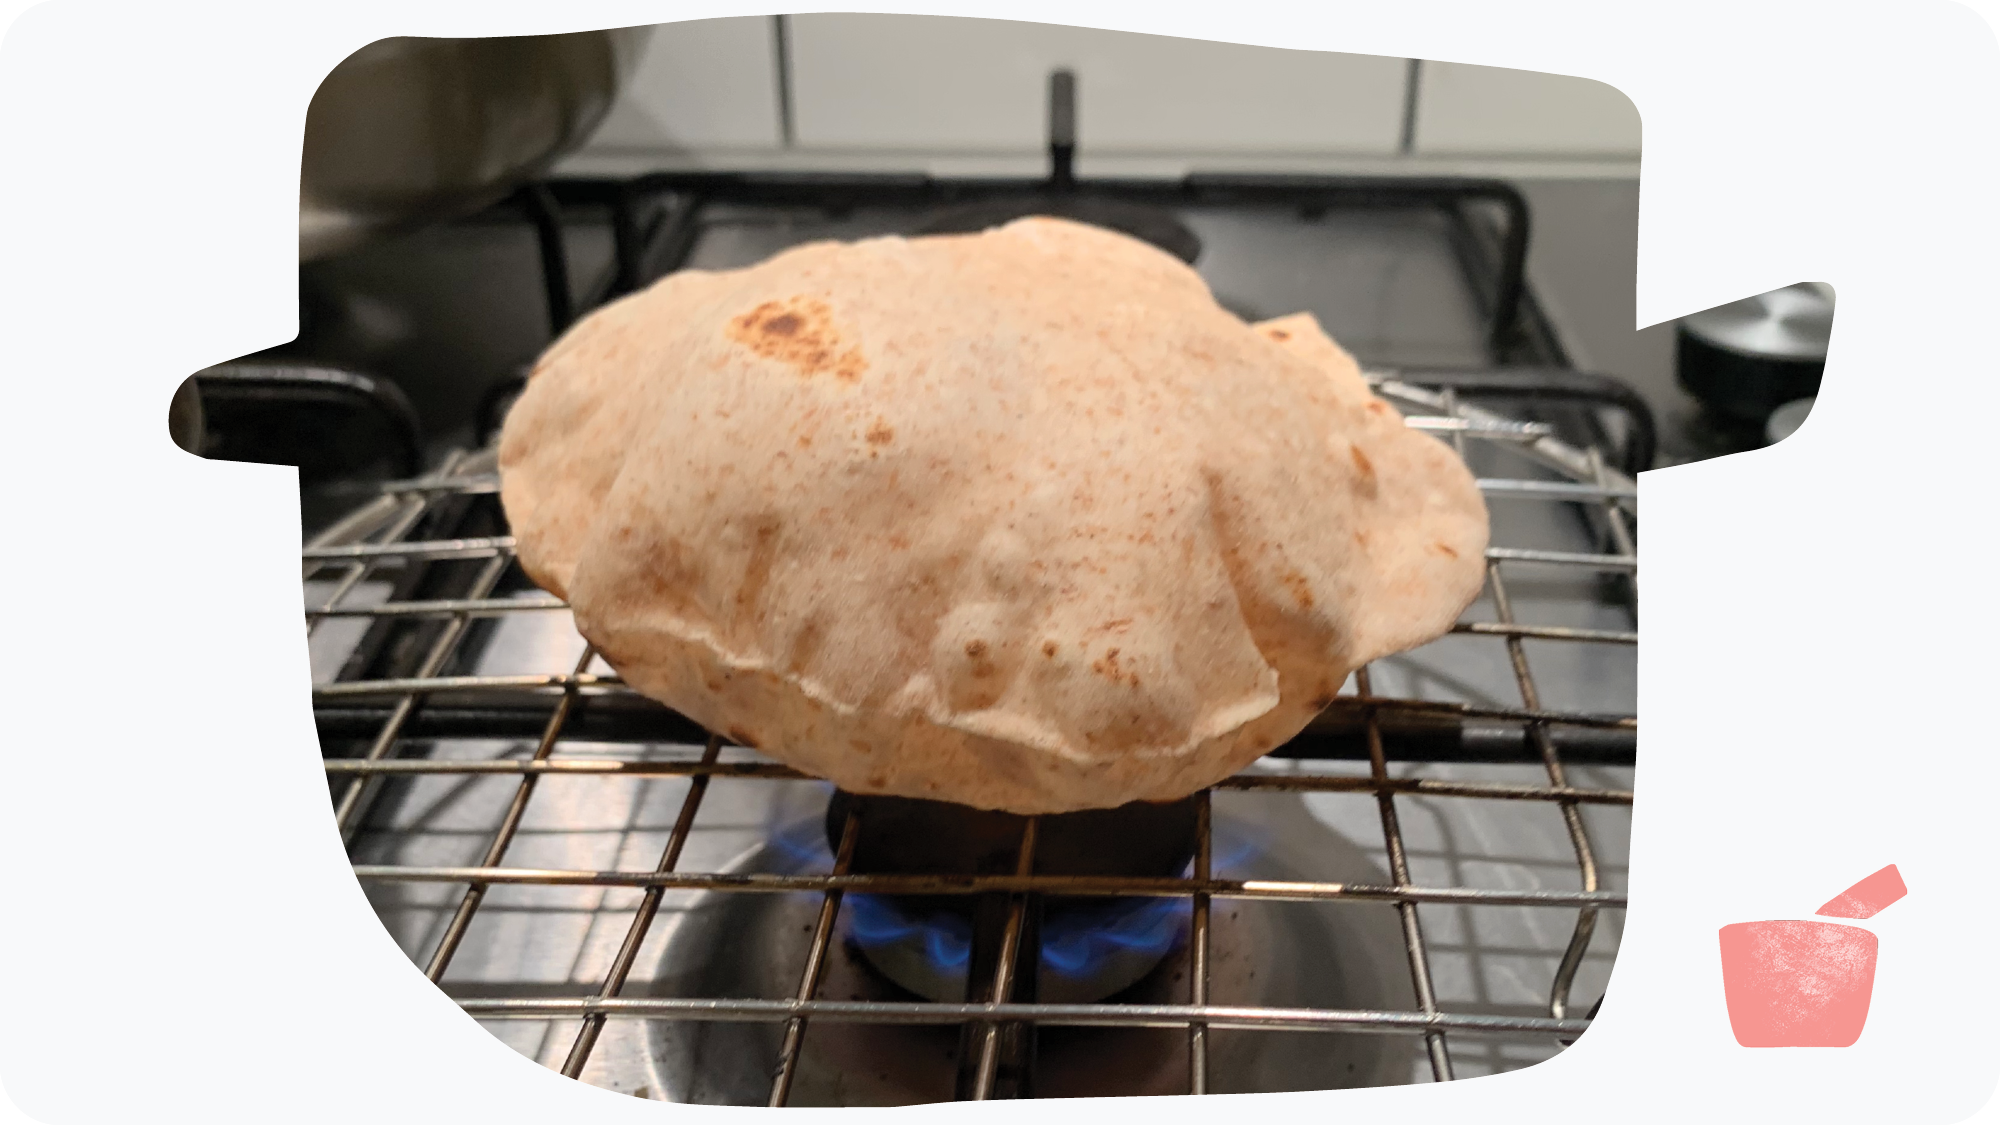
7. Put the chapati on a grill rack over a flame or under a hot grill
Note: if you’re cooking the chapatis over a naked flame, be very careful to avoid burning yourself or the chapatis. Never leave a chapati unattended when over a flame as it can burn quickly or set on fire.
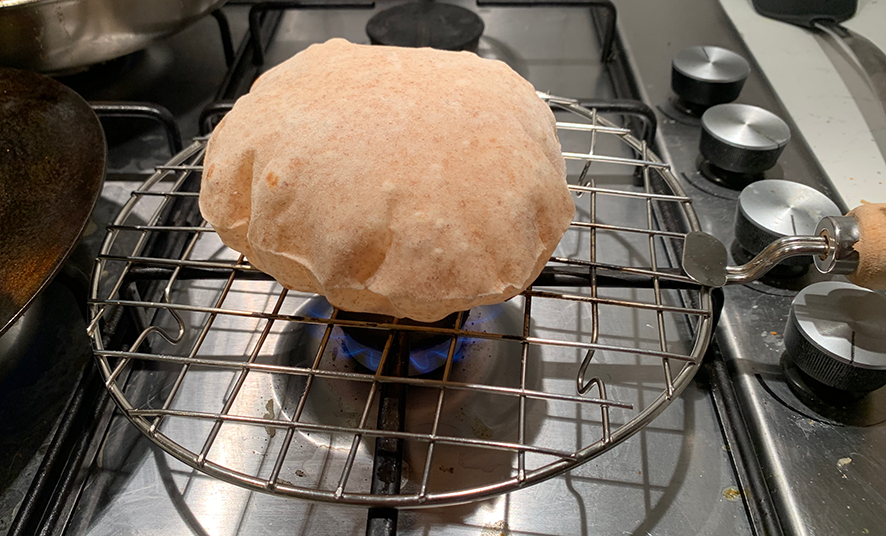
Now that your chapati has been lightly cooked on the outside, you want to finish it off by cooking it from the middle. This is achieved by exposing the chapati to high heat (a flame or grill), which causes any water it contains to become hot water vapour. The stretchiness of the dough means that this vapour is contained within the chapati, which is why this step causes them to puff up.
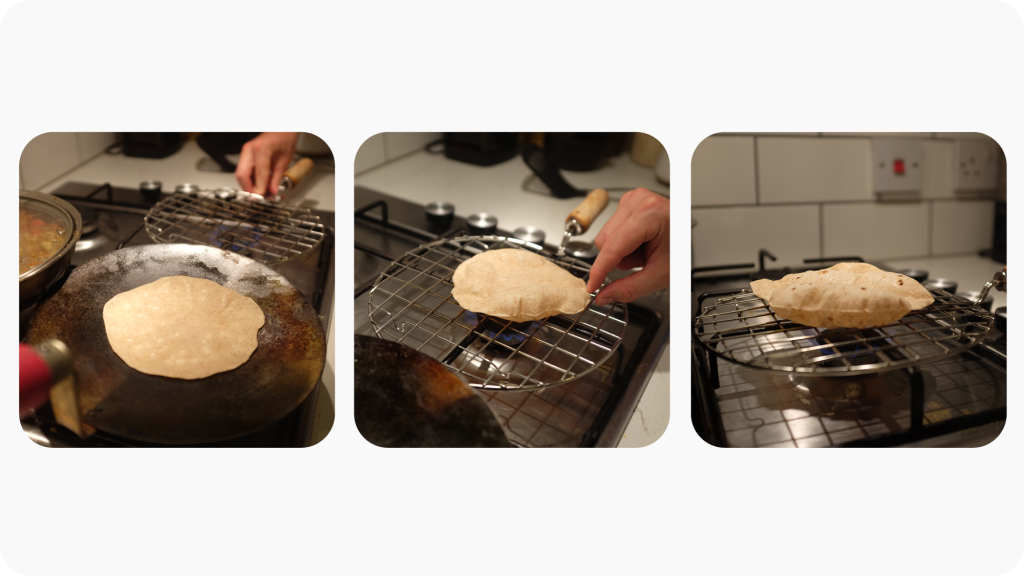
If using a flame
Light a medium flame and place a steel grill rack over the top of it. Using a pair of tongs, carefully take your chapati from the tawa, flip it over and place it directly on the flame (so the side that was cooked on the pan first is face down over the flame).
You should see the chapati start to puff up as the flame heats it and the water vapour is released. Ideally what you’re aiming for is the whole chapati inflating like a balloon, but you’re doing very well if this happens every time. I like to give mine a little tap with a spatula next to any pockets of air to encourage them to expand – I’ll be honest and say I have no idea if this has any actual effect, but it’s how I was shown to do it and it’s become a habit.
Using tongs, flip the chapati over after about 10 seconds and place the other side over the flame for another 5-10 seconds (being careful not to burn either the chapati or yourself). Then take the chapati off the flame with your tongs and and wrap it (along with any other finished chapatis) in a clean tea towel to keep it warm and soft.
Turn the flame off on your hob until ready for the next chapati.
If using a grill
Make sure your grill is heated to its hottest setting, and then use tongs to place the chapati on a grill rack around 6 inches below it (you will want to experiment with the exact distance depending on the heat of your grill, but a perfect chapati will expand to about 4 inches, so you want to leave at least this much distance).
As with cooking on a flame, you should see the chapati start to puff up, but I wouldn’t recommend trying to tap it with a spatula as this risks burning yourself on the grill. Instead just wait for 10 seconds and then flip the chapati over with tongs and leave for another 5-10 seconds before using your tongs to move place it into a clean tea towel and wrap it along with any other finished chapatis until you serve them.
If you’re cooking more chapatis, then leave the grill on so it maintains heat. If you’ve made your last one, then switch it off and enjoy your meal.
8. Repeat this process for each chapati
Now all you need to do is repeat this process with all of your flat chapati doughs. You should get a feel for it quite quickly in terms of how much time each chapati needs depending on the precise heat of your stove or grill.
One thing to watch out for is to make sure the tawa/frying pan doesn’t get too hot, as this can burn the chapatis. To avoid this I turn the heat down/off when finishing each chapati over a flame or under a grill.
Once you’re done, sit down and tuck into your chapatis. They go brilliantly with almost any curry, are a great snack with either butter or chutney, and also work very well as a wrap around an omelette.